
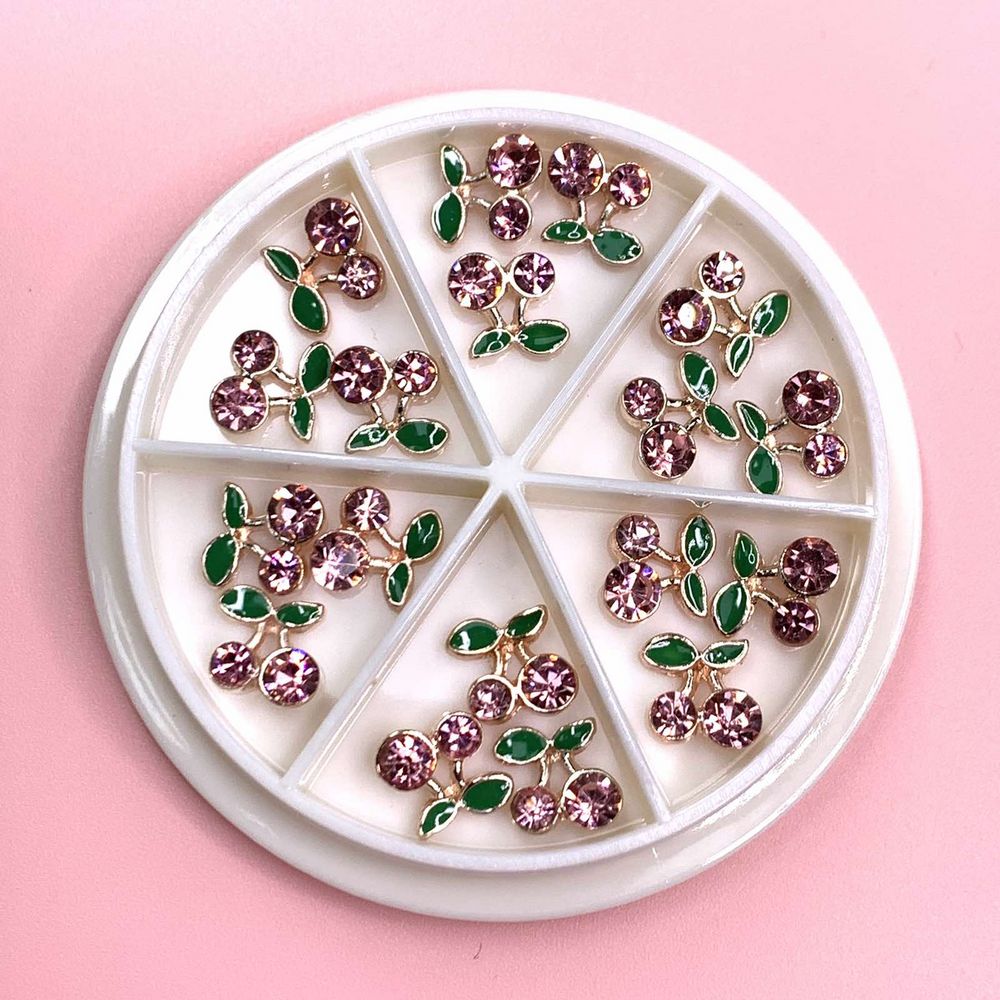
Small nail decorations can make a big design statement. Pink cherry nail charms are playful, beginner-friendly accents that fit a wide range of looks — from minimalist to full glam. This guide breaks down what the set contains and walks you through each step so you can use them confidently at home or in a studio.
What’s included and why it matters
The set contains 18 pink cherry charms arranged in a compact 6-grid wheel. These medium-size charms are sized to work well on most natural nails and enhancements without overpowering the nail bed. The wheel keeps the pieces organized and easy to access while you work.
If you want the exact set, explore these pink cherry charms to view the layout and confirm contents before you buy.
Key terms every beginner should know
- Charm: A small decorative piece attached to the nail surface for instant focal detail.
- Medium size: Indicates the charm sits comfortably on an average nail without needing trimming or extra adjustments.
- Wheel: A storage tray divided into compartments that prevents mixing and makes selection fast.
- Adhesive options: Common choices include nail glue for permanent hold, builder gel for a stronger embed, or a thick topcoat for temporary placement.
Step-by-step: applying pink cherry nail charms (beginner-friendly)
- Prepare the nails. Clean, shape, and buff lightly. Remove oils with alcohol or a nail cleanser so adhesives bond reliably.
- Plan your design. Place charms on the wheel and arrange them next to the nail to test scale and placement before committing.
- Choose your adhesive. For a long-lasting finish use a small drop of nail glue or cure a thin layer of builder/UV gel. For temporary looks, a thick, glossy topcoat works.
- Pick up the charm. Use a wax pencil, fine tweezer, or an orange stick with a tacky tip to lift a charm cleanly from the wheel.
- Attach carefully. Apply adhesive to the back of the charm or directly on the nail, then position the charm. Hold briefly until it sets. If using gel, cure under the lamp as directed.
- Seal and finish. Apply topcoat around edges or over the charm if the design allows; this reduces snagging and helps longevity. For fully embedded looks, encapsulate with builder gel or acrylic.
Practical tips for cleaner, longer-lasting results
- Work on one nail at a time so the adhesive doesn’t skin over before you place the charm.
- If a charm feels too large, you can reposition it toward the cuticle or free edge for a better fit rather than trimming the piece.
- Use a small file to gently roughen the charm’s back only if you notice poor adhesion; most charms bond fine on the factory finish.
- When sealing with topcoat, brush around the edges first to reduce lift before applying an overall coat.
- Store unused charms in the wheel to prevent loss and keep them dust-free between uses.
Who these charms are best for
This 18-piece pink cherry set is great for nail students, independent nail techs building a trendy portfolio, and DIYers aiming for a quick seasonal accent. The medium size makes them suitable for both shorter and longer nail shapes. Because the wheel is compact and organized, the set is also handy for mobile appointments and kit storage.
Care, safety, and common cautions
- Avoid applying adhesive to skin; only apply to the nail plate. If glue contacts skin, remove immediately with an acetone-based remover and rinse.
- Keep charms and adhesives away from children and pets to prevent accidental ingestion or misuse.
- For clients with sensitive skin, perform a patch test with adhesive beforehand to check for reactions.
- When removing charms, soak in an appropriate remover rather than prying aggressively to prevent nail damage.
Final notes and where to buy
These decorative pink cherry accents are a simple way to update a manicure without complex techniques. The set is priced around $8.00, making it an affordable addition to your nail kit. If you have supplier questions, the vendor lists contact options for support and ordering. Give one nail a trial placement first to see how the scale and color work with your polish choice before committing to a full set.
With a little practice and the right adhesive, you can turn these small charms into standout details that elevate basic manicures into thoughtful, on-trend nail art.
