
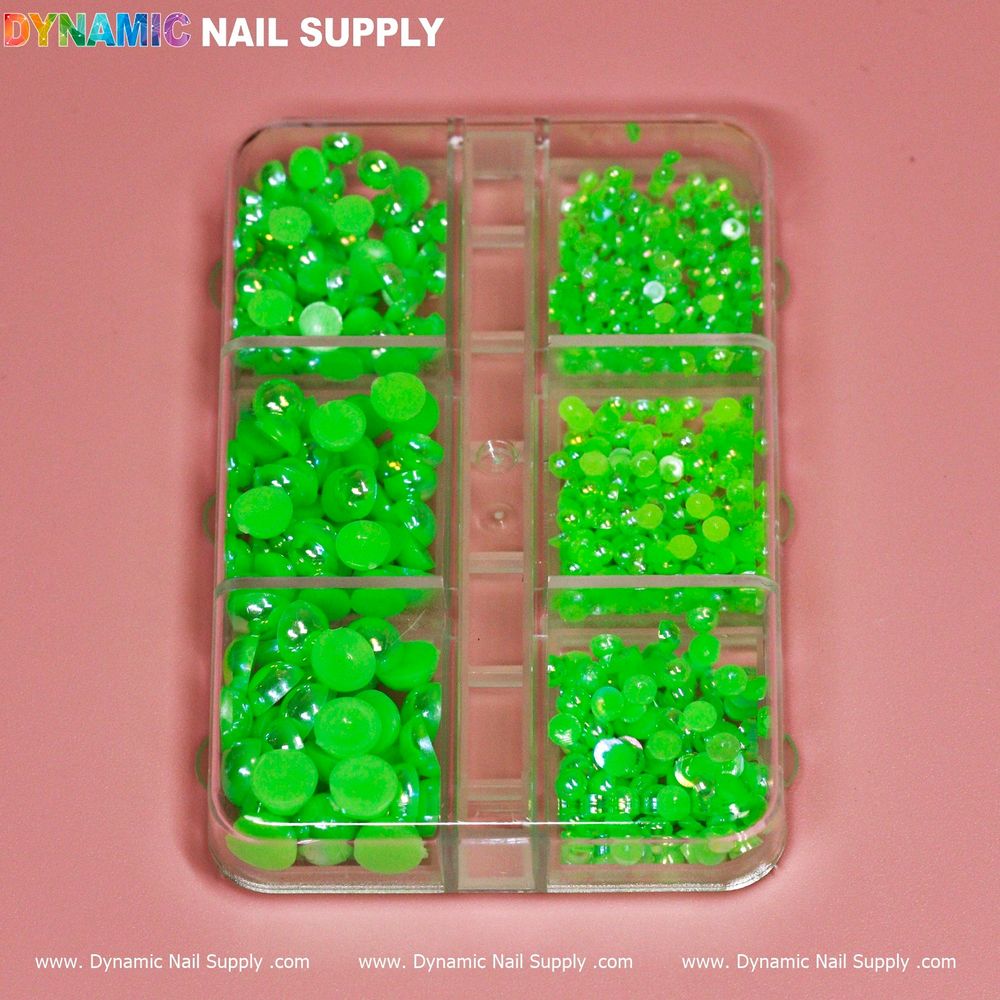
Small decorative pearls and round beads can instantly elevate simple manicures into salon-style nail art. This guide explains what green pearl nail beads are, clarifies common terms you’ll see, and walks a beginner through a safe, repeatable application process.
What are green pearl nail beads? Key terms explained
Green pearl nail beads are tiny round embellishments used to decorate nails. They are often described as “pearls,” “ball beads,” or “flatback rhinestones” depending on their surface and how they’re applied. “Flatback” means the underside is flat so the piece sits flush against the nail surface, making adhesion easier.
What comes in the pack
One pack contains six grids of pearl or bead pieces suitable for nail design. That arrangement helps you dispense small quantities while working and keeps beads grouped for different sizes or finishes.
If you want to inspect an option or buy a starter set, check out these green pearl beads for details and availability.
Tools and materials you’ll need
- Base coat and top coat (regular or gel), to secure beads.
- Tweezers or a wax pencil/dotting tool for precise placement.
- Nail glue or a sticky gel layer—used sparingly—to adhere the beads.
- Clean-up brush and acetone or polish remover for tidy edges and removal.
Step-by-step application for beginners
- Prep the nails: File and shape nails, push back cuticles, and clean nail plates so beads sit flat.
- Apply base color: Paint your chosen polish and allow it to dry or cure as appropriate for the product you’re using.
- Create an adhesive spot: Apply a tiny dot of nail glue or place a small bead of still-wet top coat where you want each pearl. For gel systems, use a tacky layer before placement.
- Pick and place: Use tweezers or a wax pencil to lift a bead from the grid and set it onto the adhesive spot. Press gently so the flatback sits flush with the nail surface.
- Secure and finish: Once all beads are placed, apply a thin layer of top coat around and between beads to lock them in. For extra hold, seal edges with a second top coat layer after the first dries or cures.
Placement tips and common beginner mistakes
- Work one nail at a time so adhesive doesn’t dry before placement.
- Use minimal glue—excess adhesive can ooze around beads and dull their shine.
- Keep a toothpick or fine brush handy for nudging tiny beads into perfect position.
- Avoid crowding: leave enough space so each bead is visible and the top coat can flow between pieces.
Care, removal and safety notes
Handle beads gently when washing hands or performing rough tasks. To remove, soak a cotton pad with remover or acetone and hold it on the bead area until adhesive softens; then lift beads carefully. Because these pieces are small, keep them away from children and pets. If you have sensitivity to nail glues, perform a patch test before full application.
Who should use these beads and how they fit into your kit
Beginners who want to learn simple embellishment techniques will find these beads useful because they come organized in six grids, making selection and storage straightforward. Nail technicians adding accent details or hobbyists experimenting with texture can both benefit from having a small supply on hand. One pack is listed at $6.00 as a starting price, though availability and pricing may change.
Where to get more help
If you need product or ordering information, the seller provides contact options and social channels for questions. Dynamic Nail Supply is the listed company for this product and can be reached through the details provided by the retailer.
Quick checklist before you start
- Nail plates cleaned and prepped
- Base color applied and dry
- Glue or tacky layer ready
- Tweezers or wax pencil at hand
- Top coat reserved for sealing
With a little practice you’ll find placement speed and glue usage become second nature. Start with single-accent nails to build confidence, then experiment with borders, clusters, or mixed-size layouts as you grow more comfortable. Small, organized packs of green pearl nail beads are an approachable way to add a luxe touch to everyday manicures.
